Wednesday, January 30th, 2013
After running into a lot of USB-related issues on the Raspberry Pi, I decided to upgrade to the ODROID-U2 from Korean company HardKernel. It’s more expensive but has much better specs.
Running rock solid so far!
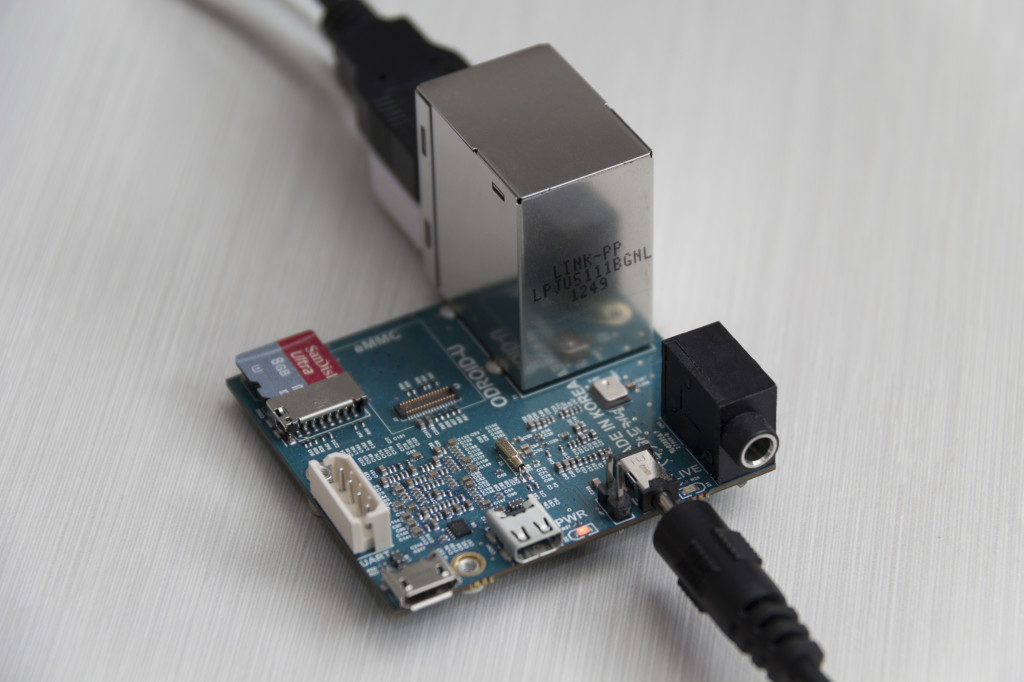
ODROID-U2
Posted in Gentoo, Hardware, Linux | No comments »
Sunday, June 24th, 2012
So… I bought a Raspberry Pi. It was really tasty, so I had to buy 300 more. Ok, so it’s not actually raspberry-flavoured and it certainly has nothing to do with pies, or the mathematical constant π either.
What it is related to, however, is electronics. In a nutshell, it’s:
- an ARM-based, fully-featured, embedded computer scaled down to the size of a credit card
- it has a 700MHz stock-clocked ARM CPU (ARM1176JZF-S), and
- 256MB RAM
- an SD card slot to store the operating system
- HDMI + composite out
- 100mbit LAN
- a GPU fast enough to play full HD 1080p video
- 2 USB 2.0 ports
- some low-level peripherals
- and it costs just $35USD
What a neat little thing. You can read more about it and its initiative at the Raspberry Pi Foundation’s website.
Mine actually arrived about a month ago but I never found the time to sit down and blog about it – well, now I can! And I’ve got some interesting concepts to share.

My Raspberry Pi, with a 3G modem and GPS module connected, all running off a 16Ah battery
With this setup I was able to make a live GPS tracker, using as well, of course, Google’s Google Maps API. I’ll show some screenshots of that soon.
This is one step forward in the project me and a few friends have been thinking about, which is to make a quadcopter (camera included) that is controlled over the Internet. We’re still very much in the planning phase, but we have definitely made some progress and I’ll be glad to keep blogging about that as it gets formed.
Posted in Hardware, Linux | 32 comments »
Friday, April 20th, 2012
About a week ago, I was removing a slowly-failing Seagate ST31000340AS (nearing 5 years old) from my file server. I had backed up all the files onto a Seagate ST32000542AS so that I could return the failing drive to Seagate for a free replacement unit. Upon removing the drive and returning to boot the server again, I noticed the ST32000542AS was no longer identified as such but instead as ST_M13FQBL. In the OS, the drive showed up as having 3.86GB capacity and Windows was complaining that the drive was not initialised (nor could its contents be accessed in any way). With some quick Googling I realised that this can happen if the SATA cable becomes slightly loose – and that was the case. I reseated the cables and we were back in action.
However, the woes continued.
Since the former drive was no longer present (and it used to contain my OS), I had to reinstall Windows on another drive. I decided to give Windows 8 Server a go to compare differences from Windows Server 2008 R2 (why not?). It crashed halfway through the install and then complained about winload.exe being corrupt. I laughed and blamed Windows, until I finally realised it wasn’t actually Windows’ fault. In the BIOS, the drive was shown to have a capacity of 0MB with 0 sectors.
Ouch.
I downloaded the most recent copy of Hiren’s BootCD to save my arse (since I had no other OS to boot from to try and find out what the heck was going on), booted it via USB, and found that in both the included version of Mini Windows XP and Linux-based Parted Magic the drive was shown not to be responding in any way. I either got I/O errors or other generic failures when attempting to access it.
At this point I was more annoyed than distressed because I knew the drive was not experiencing any mechanical failures; it spun up, calibrated and sat idle waiting for tasks. I just couldn’t instruct it to do anything.
Much Googling proceeded that lead to many questions – is it a firmware issue? Is it my drive’s PCB? I found there was a firmware update available, from CC34 to CC35; perhaps that would fix it I thought. I updated it, but nope, same deal. 0MB and 0 sectors.
I felt like I hit a brick wall at this point, but I kept researching. I found a replacement PCB on eBay for $50 which I felt was a bit pricey (still cheaper than commercial recovery solutions) so I’d have to be sure it was the PCB before I bought it. The seller had some nice suggestions about contacting them if I had any questions, and that’s what I did, mentioning I already tried a firmware update to no avail. This was their reply:
Hi Milos,
Thank you very much for your message.
I don’t think a PCB will fix this problem, it is most likely a firmware issue. This part of the firmware is stored on the drive platters, not on the PCB. Please give this or this a try. It is supposed to fix the firmware problem, hopefully it helps! If you need help locating the necessary equipment, you can try a pre-made kit from our business partner.
I hope this helped and please let me know if you have any other questions.
Best Regards,
Kevin
PCB Solution – Hard Drive Circuit Board Specialists
What a nice guy – not only did he stop me from buying something that he knew wouldn’t help me, but even linked me to what in the end actually solved my issue.
On first glance the first link disappointed me because it said “These are instructions for fixing a Seagate 7200.11 hard drive that is stuck in the BSY state. This can be determined by the fact that it won’t be recognized by the computer’s BIOS. If your drive is detected, but shows up as a size of 0, then you’re drive has a different problem and these instructions will not apply.” Needless to say, I didn’t apply the fix as it told me that this clearly wasn’t for my drive, as mine did show up in the BIOS correctly but with a size of 0, so I put it aside and continued searching for a solution.
After about 48 sleepless hours I stumbled across this post, which shows somebody with the exact same model hard drive as me had the exact same issue I was having, and was able to resolve it using the 0 LBA fix mentioned here. By that point I was pretty sure the fix would work for me too, even though it’s stated all over the place that this is only for the 7200.11 series (my ST32000542AS is a 7200.12 series). I ordered myself a USB to RS232 TTL PL2303HX auto converter module off eBay instead of following the suggested procedures because this module did it all-in-one; I didn’t need multiple connectors or converters. To top it off, I didn’t even have to wait long since I just ended up borrowing a friend’s the next day!
The procedure
I plugged the USB module into my netbook, attached 3 wires to the correct serial port connectors on the hard drive, powered the drive the same way as always, and I was in business. I configured PuTTY (my terminal emulator of choice) with the parameters mentioned on the site I linked earlier, and opened a connection with COM12 which is whatever Windows decided to pick as the port when I inserted the module.
The following are the commands I entered, each line followed by a newline character (enter):
CTRL+Z
m0,2,2,0,0,0,0,22
Giving me this output:
User Partition Format Successful - Elapsed Time 0 mins 00 secs
Zone re-format was skipped.

Once I saw that output, and only once I saw that output, I powered down my drive, plugged the SATA cable back in and booted the machine, as instructed. And, just like that, it was fixed.
So, hearing it from another successful fixing of the 0 LBA problem with a 7200.12 series drive, don’t necessarily be taken aback if you have the same issue and you don’t have a 7200.11 model which everybody is claiming is the only model for which this fix is made for.
Good luck and remember, even though I’ve said what I’ve said, my comments come with ABSOLUTELY NO WARRANTY. If you bricked your drive following these instructions then I’m sorry, but it worked for me.
Posted in Hardware | 35 comments »
Tuesday, March 6th, 2012
I decided yesterday on a bit of a whim that I wanted to replace my current network router, which is not exactly your typical router. While you could say that typical routers consume something like 2W of energy, come in a decent-looking plastic enclosure and have lots of continuously-flashing lights, mine’s actually a full-height computer in a boring old tower box. What’s worse is that it has an Intel Pentium D 960 3.6GHz dual-core processor, which loves to eat at the power bill. Those who realise that a router is not meant to be a power-hungry device like this would probably be yelling at their screens right now, and it’s true; 130W TDP for just the CPU is far too excessive to be run 24/7 given that an average router CPU (let’s say 400MHz or so) will consume a watt or less.
But why would you even use a full-size computer as your router? Well, your standard router is a locked-down ARM/MIPS box with limited resources and countless vulnerabilities. Instead of that, using a generic computer configured as a router means you can put virtually anything else on it too, tweak it to your heart’s content, and keep it secure with software updates. I installed Gentoo Linux on mine which gave me kernel-level customisation as well as the ability to open the box and add components to the motherboard.
When you buy a router from the local store, granted it’s probably fine for most people’s homes as-is, you’re not really able to tweak the components to for example add more memory or insert an additional network card if you need it, and you’re definitely not able to tweak the OS without re-flashing the firmware with a third-party variant like DD-WRT, OpenWRT, Tomato or others which can still be limiting.
I don’t like having those restrictions.
I like something that I can tailor to suit the task exactly, which in my case means making it more generic to allow for future integration with other systems. And what do I mean by that? Well, handling HDTV network streaming will be one, holding a second fail-over 3G connection to switch to automatically in case the main connection goes down is another, and most-importantly having the ability to do absolutely anything from an unrestricted UNIX command-line prompt on an operating system of entirely my own choice. And that’s why I bought the Intel DN2800MT, to replace my previous router (which, in case you’re wondering, had an ASUS P5VDC-MX motherboard that had slots for both DDR and DDR2 memory – strange…)
The Intel DN2800MT Mini-ITX motherboard

This thing is great. It has an on-board Intel Atom 1.86GHz dual-core processor and- wait, that’s still overkill. Ah but before you say more, let me mention that it takes 12V DC input instead of the usual AC and only consumes about 6W of energy while in use. That’s a massive improvement over my current setup while allowing for much greater customisation.
If you haven’t already spotted, the best thing about this motherboard is that it’s of Mini-ITX form factor. That means of course that it’s very small compared to a typical computer motherboard (which is usually ATX and requires active cooling, although it’s also common to have mATX which really isn’t much bigger), giving me the chance to get a nice slim box for it.
And here it is.
M350 Universal Mini-ITX Enclosure

Okay so we’ve now entered the grey-area. That’s the case I’d like to get, but I know it isn’t going to have any space for a PCI-E x1 card, which I will need for the secondary NIC as the motherboard only has one built-in (sadly). I’ve been researching a potential solution and I’ve found that you can use right-angle riser cards to switch what once was the height to now go length-wise in the case.
PCI Express x1 right-angle riser card

That’s exactly the remedy I need for the expansion slot. It probably still can’t fit in that tiny case, though, but a slightly taller one is still better than a full-size Mini-ITX case, which is comparatively twice or thrice as high as the one already pictured.
More soon.
Posted in Hardware, Linux, Networking | 6 comments »

