Wednesday, January 30th, 2013
After running into a lot of USB-related issues on the Raspberry Pi, I decided to upgrade to the ODROID-U2 from Korean company HardKernel. It’s more expensive but has much better specs.
Running rock solid so far!
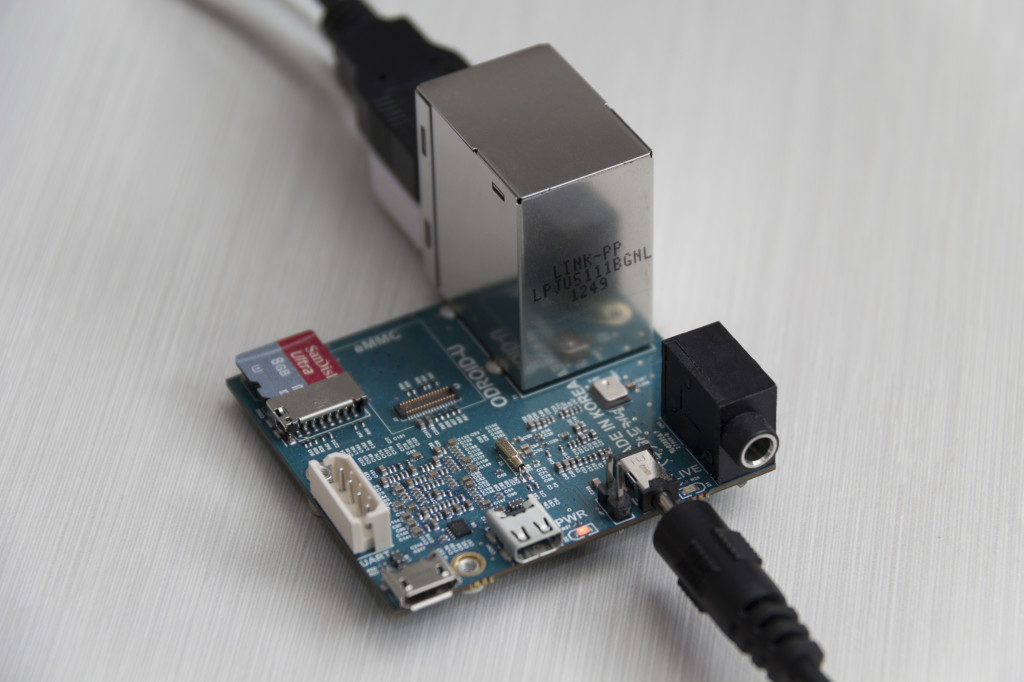
ODROID-U2
Posted in Gentoo, Hardware, Linux | No comments »
Sunday, June 24th, 2012
So… I bought a Raspberry Pi. It was really tasty, so I had to buy 300 more. Ok, so it’s not actually raspberry-flavoured and it certainly has nothing to do with pies, or the mathematical constant π either.
What it is related to, however, is electronics. In a nutshell, it’s:
- an ARM-based, fully-featured, embedded computer scaled down to the size of a credit card
- it has a 700MHz stock-clocked ARM CPU (ARM1176JZF-S), and
- 256MB RAM
- an SD card slot to store the operating system
- HDMI + composite out
- 100mbit LAN
- a GPU fast enough to play full HD 1080p video
- 2 USB 2.0 ports
- some low-level peripherals
- and it costs just $35USD
What a neat little thing. You can read more about it and its initiative at the Raspberry Pi Foundation’s website.
Mine actually arrived about a month ago but I never found the time to sit down and blog about it – well, now I can! And I’ve got some interesting concepts to share.

My Raspberry Pi, with a 3G modem and GPS module connected, all running off a 16Ah battery
With this setup I was able to make a live GPS tracker, using as well, of course, Google’s Google Maps API. I’ll show some screenshots of that soon.
This is one step forward in the project me and a few friends have been thinking about, which is to make a quadcopter (camera included) that is controlled over the Internet. We’re still very much in the planning phase, but we have definitely made some progress and I’ll be glad to keep blogging about that as it gets formed.
Posted in Hardware, Linux | 32 comments »
Tuesday, March 6th, 2012
I decided yesterday on a bit of a whim that I wanted to replace my current network router, which is not exactly your typical router. While you could say that typical routers consume something like 2W of energy, come in a decent-looking plastic enclosure and have lots of continuously-flashing lights, mine’s actually a full-height computer in a boring old tower box. What’s worse is that it has an Intel Pentium D 960 3.6GHz dual-core processor, which loves to eat at the power bill. Those who realise that a router is not meant to be a power-hungry device like this would probably be yelling at their screens right now, and it’s true; 130W TDP for just the CPU is far too excessive to be run 24/7 given that an average router CPU (let’s say 400MHz or so) will consume a watt or less.
But why would you even use a full-size computer as your router? Well, your standard router is a locked-down ARM/MIPS box with limited resources and countless vulnerabilities. Instead of that, using a generic computer configured as a router means you can put virtually anything else on it too, tweak it to your heart’s content, and keep it secure with software updates. I installed Gentoo Linux on mine which gave me kernel-level customisation as well as the ability to open the box and add components to the motherboard.
When you buy a router from the local store, granted it’s probably fine for most people’s homes as-is, you’re not really able to tweak the components to for example add more memory or insert an additional network card if you need it, and you’re definitely not able to tweak the OS without re-flashing the firmware with a third-party variant like DD-WRT, OpenWRT, Tomato or others which can still be limiting.
I don’t like having those restrictions.
I like something that I can tailor to suit the task exactly, which in my case means making it more generic to allow for future integration with other systems. And what do I mean by that? Well, handling HDTV network streaming will be one, holding a second fail-over 3G connection to switch to automatically in case the main connection goes down is another, and most-importantly having the ability to do absolutely anything from an unrestricted UNIX command-line prompt on an operating system of entirely my own choice. And that’s why I bought the Intel DN2800MT, to replace my previous router (which, in case you’re wondering, had an ASUS P5VDC-MX motherboard that had slots for both DDR and DDR2 memory – strange…)
The Intel DN2800MT Mini-ITX motherboard

This thing is great. It has an on-board Intel Atom 1.86GHz dual-core processor and- wait, that’s still overkill. Ah but before you say more, let me mention that it takes 12V DC input instead of the usual AC and only consumes about 6W of energy while in use. That’s a massive improvement over my current setup while allowing for much greater customisation.
If you haven’t already spotted, the best thing about this motherboard is that it’s of Mini-ITX form factor. That means of course that it’s very small compared to a typical computer motherboard (which is usually ATX and requires active cooling, although it’s also common to have mATX which really isn’t much bigger), giving me the chance to get a nice slim box for it.
And here it is.
M350 Universal Mini-ITX Enclosure

Okay so we’ve now entered the grey-area. That’s the case I’d like to get, but I know it isn’t going to have any space for a PCI-E x1 card, which I will need for the secondary NIC as the motherboard only has one built-in (sadly). I’ve been researching a potential solution and I’ve found that you can use right-angle riser cards to switch what once was the height to now go length-wise in the case.
PCI Express x1 right-angle riser card

That’s exactly the remedy I need for the expansion slot. It probably still can’t fit in that tiny case, though, but a slightly taller one is still better than a full-size Mini-ITX case, which is comparatively twice or thrice as high as the one already pictured.
More soon.
Posted in Hardware, Linux, Networking | 6 comments »
Wednesday, November 23rd, 2011
Okay so I got myself a Logitech C910 HD webcam (on eBay, brand new for $59USD) which has native support for the linux UVC driver, meaning it’ll work on any linux distribution if you compile it with v4l2 support. That was great and all, but it took me far too long to find out how to actually change the output resolution for the webcam to be 1920×1080. So, for anyone who is on the same boat, here is what I did.
As I use Gentoo, I had to install the media-tv/v4l-utils package (other distributions should have a similar name). Once installed I played around with the binary files and found v4l2-ctl which is used to configure the webcam once it has been plugged in (only lasts per USB session).
Running v4l2-ctl –help yielded a truckload of output which was unpleasant at first, but the solution was found nevertheless. The important parameter is:
-v, --set-fmt-video=width=<w>,height=<h>,pixelformat=<f>
                     set the video capture format [VIDIOC_S_FMT]
                     pixelformat is either the format index as reported by
                     --list-formats, or the fourcc value as a string
which will send a control to the webcam to tell it to output in the given format and resolution. For 1080p I used -vwidth=1920,height=1080,pixelformat=YUYV
Once set, it was all kittens. Open the video device (/dev/video0 for me) with your desired program and it will use the format and resolution set in the above step.
Do note that the webcam does not remember these settings so when unplugging and plugging in again, you’ll have to repeat this command.
Posted in Gentoo, Linux | 2 comments »

